Regular readers will have noticed that there haven't been any posts for a while now, and reason is simply that I've had too much to do! Writing a blog takes time and imagination, and this last month has left me very little spare time, and my imagination seems to have been overwhelmed by other responsibilities.
A Short Beach-Cruising Expedition on the Central Queensland Coast.
Back in the year 2000, I took my three boys on a camping trip near the town which is named, "Town of 1770" on the central coast of the state of Queensland, Australia. Situated adjacent to the southern end of the famous Great Barrier Reef, this part of the Queensland coast offers superb beach-cruising and island-hopping opportunities.
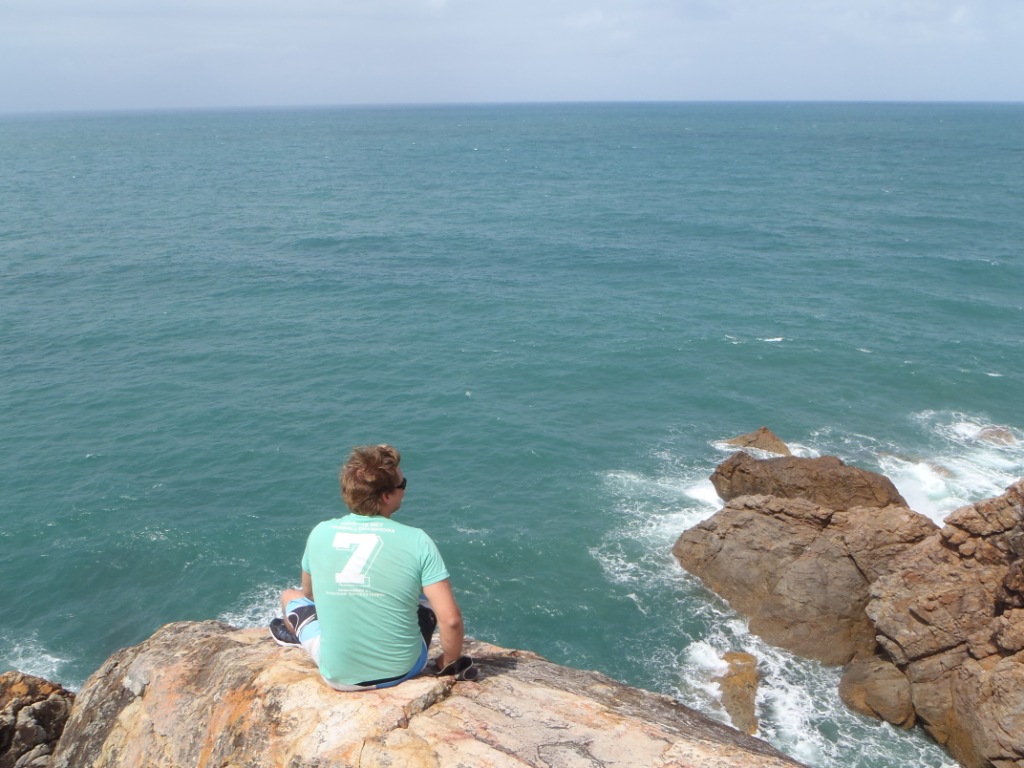
One of the boys at the time of our first trip to 1770. The same skipper is now nearly 25, and is still addicted to wooden boats. Start 'em young and you will be giving a gift which lasts a lifetime.
At the time of the year 2000 trip, my kids and three other children ran wild (but under covert observation!) for several days and nights. There were boating adventures, fishing adventures, and exciting night-time exploration of moonlit sandbars starting to rise above the many waterways of the heavily tidal estuary.
In the last couple of years there has been a bit of talk between a few of the now adults who made up the pack of kids nearly thirteen years ago. There was an obvious and growing urge to re-live that trip, and pressure was placed on me to come along. As one of my sons said, "We are going anyway, so you can decide whether to come along or stay in your workshop." He knew that a comment like that represented an unfair challenge, and predictably, I decided to go.
History repeats itself - the only change being the size of the kids.
Our plan was to leave our cars and trailers at the Town of 1770 camping ground in sites we had rented for just that purpose, and to then sail north along the coast to Jenny Lind Creek and to make our camp in the bush somewhere near the creek (keeping a weather eye open for crocodiles).
I don't know how to insert Google Earth links, but if you look up Town of 1770, Queensland, Australia and Bustard Head, Queensland, Australia, you should get to see the area in question. Jenny Lind Creek is the coastal creek immediately south of Bustard Head.
As it turned out, we arrived during a period of strong south-east stream weather, and the bars along that part of the coast were dangerous for small boats such as ours. We spent time operating to the north-west of the headland, and in there the conditions were smooth, but the wind was unsuitable for pleasant sailing. The strong south-easter was blowing over the top of the headland and we were in frustratingly fluky wind conditions.
All dressed up but no suitable wind for local sailing. That is Bustard Head which you can just see as high ground in the far distance. Jenny Lind Creek is at the bottom of that spur.
However, there is always something to do if you have a boat, and so we did some exploring of the estuary near 1770. But first two of us had to try the conditions outside the shelter of the headland. We tied in a double-reef and with the other two guys stationed suitably for observation and photography, off we went!
Sons Geoff and Dave did a reconnaissance before we went out. That is Dave high on the headland, with Geoff taking the photo
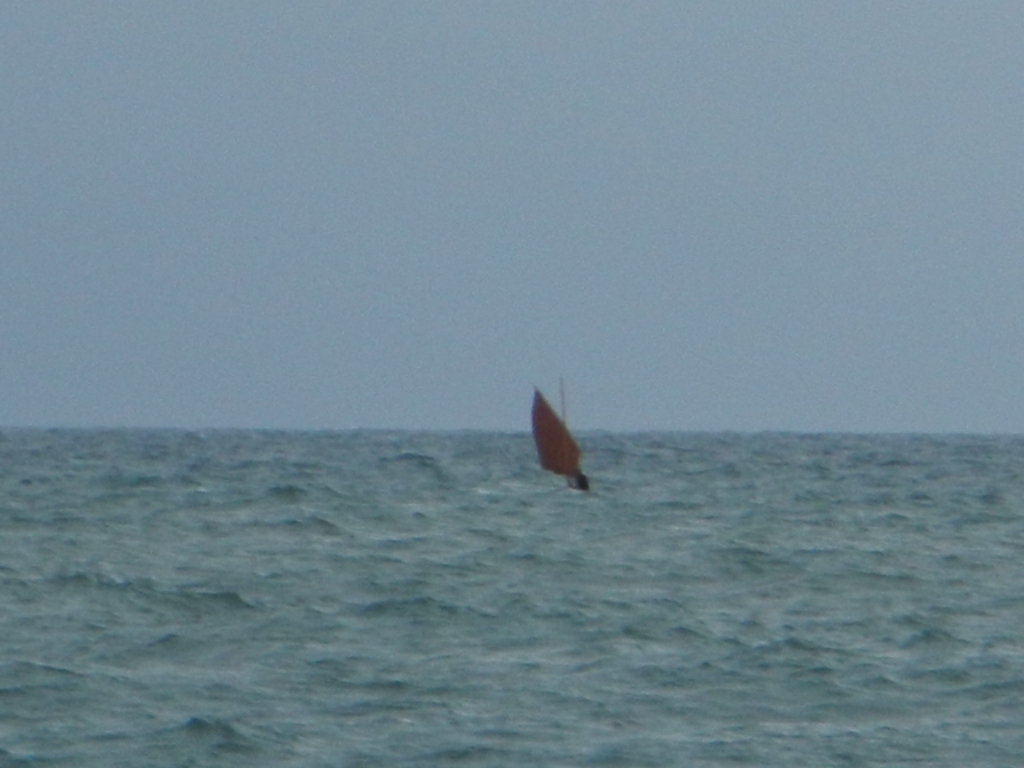
Double-reefed, and with PFD's on, son David and I head out towards the headland. Even though it is pretty calm, the bow wave indicates that we are on the move. This sort of sailing should not be attempted if you lack experience, and the correct equipment.
Clearing the wind-shadow of the headland, and starting to feel that the double-reef was a wise move. Note how the hull is disappearing behind the waves.
A nice photo taken by my friend, Ian Hamilton
Cameras always seem to make the sea look flat, but trust me when I say that it was rough out there!
Back inside the headland with the boat snugged down for the night. One of the pleasures I gain from dinghy sailing is looking at a beautiful boat swinging to an anchor. This great photo was taken by Geoffrey Lillistone
One of the good things about being stuck inside the estuary for a few days was that we were free to explore and have fun, without time limits. One favourite game is seeing if you can get around a particular obstacle without tacking, or doing it in fewer tacks than someone else...
Geoff photographing one of our attempts at weathering a conveniently placed sandbar. He is shooting from inside Ian Hamilton's Bolger-designed Sharpshooter.
We have sighted the challenging sandbar, and the game is on...
A handy little wind shift helps our cause...
...but the wind drops away and backs, making things look tricky - and brings on worried looks.
Pinching up in the hope that we can balance boat-speed against ground lost to leeway.
We made it!
The smiles show you just how much fun these challenges can be.
A lesson in hydrodynamics - see how the boat pulls a big wave when in very shallow water.
After a few days of playing, the wind moderated enough for us to attempt an outside run to have a look further up the coast. Due to time constraints we all climbed aboard Ian's Bolger Sharpshooter.
Approaching Middle Creek bar from the seaward side.
Safely inside the Middle Creek estuary, with just enough time to....
....scramble through the bush to have a walk on the ocean side. That is the headland and Town of 1770 in the distance.
Ian playing the fool for the camera. His Sharpshooter has done some interesting trips since he first built her a long time ago. He runs a 30hp Yamaha 2-stroke with a 4hp Johnson auxiliary.
This "Birdwatcher"-style cuddy-cabin is an addition which has proved to be of wonderful value.
Not everybody makes it through the bar. Well, I guess it was probably a simple case of abandonment, but it makes a nice photo. Taken by Ian Hamilton.
The two boats we used on this trip are examples of well-used home-built boats which have stood the test of time. The sailing dinghy was designed and built by my father back in 1970, and has been in constant use ever since. She has done a huge amount of work, but is still going strong. Ian's Sharpshooter has been going for at least twenty years, and probably more. Neither boat cost much to build, but they have provided satisfaction and adventure beyond measure.
I look at internet forums where people talk endlessly about minute details regarding this boat or that which they are "going to build". My response is to forget about procrastinating, and just get out there, build a boat, and learn to use her. You will be glad you did!
A frequent complaint I hear from amateur boatbuilders is the dificulty they experience removing excess cured epoxy from glued joints, glass cloth, and fillets. Most people seem to attack the epoxy with a power sander or a chisel, but not only does that make an unpleasant job time-consuming - it also generally results in damage to the surrounding timber.
The use of masking tape alongside glue joints goes a long way towards keeping the job clean, but it is inevitable that clean-up of cured epoxy will have to be done frequently. I have attached a short video clip explaining the use of a heatgun and scraper for epoxy removal, but always try to be as neat as possible in the first place. When using a heatgun, be careful to use the heat to the minimum extent necessary to remove the material, and keep the gun moving so that you don't get deep penetration of heat into the joint.
Here is the video we made in the workshop - I hope it helps.
Here is a photo from a recent trip to the Town of 1770, in Queensland, Australia. The boat is my 42 year-old cruising dinghy, designed and built by my father. Construction is plywood batten-seam, 15' 2-1/2" x 5' 11". Originally rigged as a Bermudan Sloop, her current rig (one of many) is a free-standing balance lugsail of 115 sq.ft.
I've maintained and modified her over the years, but a lot of the most recent work has been carried out by my second son, David. Photo taken by the oldest of my sons, Geoffrey.
In 2004 I built two versions of Phil Bolger's Hope, a 16' 0" x 6' 4" working lobsterboat.
A scan of Hope taken from Phil Bolger's book, "Small Boats"
Copyright 1973 International Marine Publishing Company ISBN 0-87742-036-X
Both boats were built to order for customers here in Australia, but as is so often the case with custom-built boats, the customers wanted changes from the published plans. When purchasing the plans from Phil, I asked him about the proposed changes, and he was generous enough to trust my judgement with both the layout and the construction plan for my glued-lapstrake hull proposal.
One frequently hears of designers becoming irrate about changes being made to their plans without consultation and/or permission. A good designer will have thought over every element which goes into a design, and you had better be sure you know what you are up to before changing anything - even the smallest detail. Remember, when you purchase a plan, you are generally only purchasing permission to build a single boat to the design - the design remains the property of the designer. If you want to change something to make it your 'perfect boat', consider building a different design which doesn't need to be altered, or as I did, consult with the designer to see if he/she is prepared to allow the changes to be made.
The first Hope under construction in my Brisbane workshop. This one was powered by a Yanmar 1GM10 9.2hp inboard diesel, and was fitted with a small cuddy-cabin.
Over the years I found Phil Bolger to be an exceptionally generous person. Although I never met him he was my most important teacher (and continues to be to this day even though he has been dead for sometime). Knowing that he must have been overwhelmed with correspondence, I only wrote to Phil if I needed to purchase plans, or if I needed permission to alter a design in some way. However, busy though he was, Phil always answered me promptly with (mostly) hand-written letters of substantial length. Sometime after the two boats were built, Phil wrote this article in Messing About in Boats.
The inboard Hope back at the boat ramp the evening following the first launching. The customer had gone home, and I was ready to relax with a drink after what had been a very long day of preparation.
That is me in 2004 - tired but happy after the Hope launching
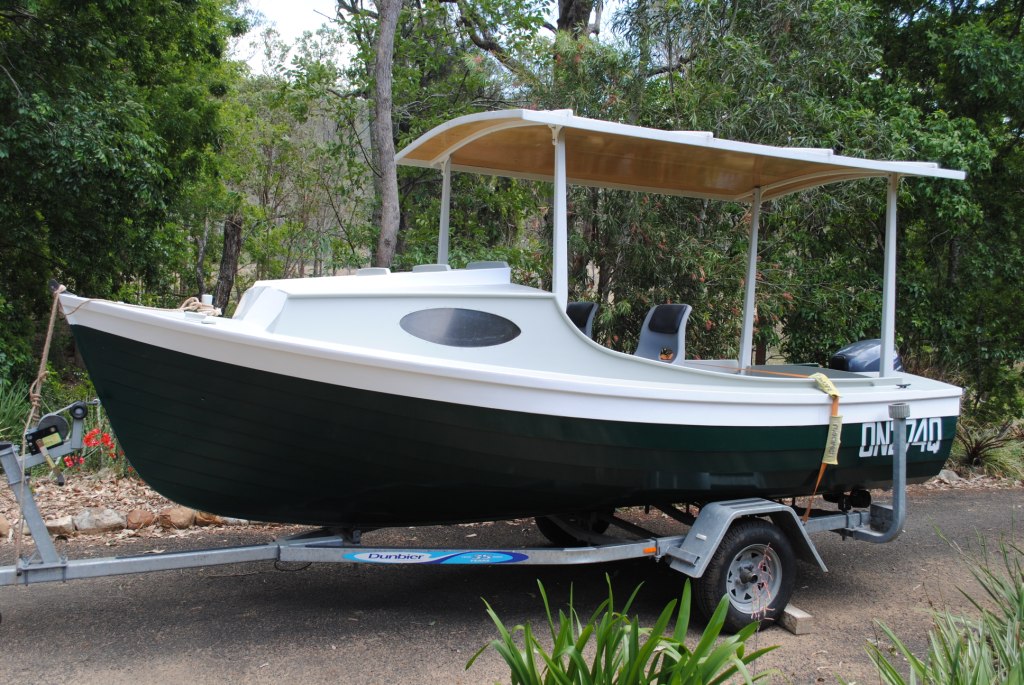
The second Hope was built almost concurrently with the first, but was set up to carry a 15hp four-stroke outboard. This boat was much quieter and smoother than the diesel-powered version, and was fitted with a light-weight timber sun awning at the request of the owner (after the boat was finished). I've written about both of these boats in a previous post and in another here.
After eight years of using their Hope, the owners of the outboard-powered version are making some life-changes, and as part of that process they have put their boat on the market. Anybody who is seriously interested in this boat can email me via the address here , and I will put you in contact with the owners (I'll be away 2 November- 6 November, but the emails will be answered).
Here are some photos taken just the other day. The timber canopy is easily removable, and the cockpit is self-draining.
Robert has left a couple of comments on the blog which bring up some interesting points: -
My proposed Swampscott-style dory.
I'd be interested to hear Ross's comments about stitch and glue construction in general, and perhaps when he writes more about his new dory design he will. Was the caveat more the puzzle joints themselves or the stitch and glue process itself? Seems the boat went together well once the planks were correctly shaped. I've not yet completed a hull from either method but am eager to learn. Seems a lot of great stitch and glue boats are on the water, and it always seemed to me that for a one off boat the strongback doubles the workload
Ross, looking forward to hearing more about the Scram Pram. Hopefully a sailing report will accompany a future writeup. As regards your Swampscott ideas, when writing more about the design could you elaborate more about the strengths and weaknesses of stitch-and-glue and glued lap? Looking forward to more about that design. Kits have a lot of appeal, especially to people who have limited time for marking and cutting, or for whom the idea of marking and cutting is intimidating. The instinctive reaction of many is that a kit of cut panels will reduce construction time enormously, and that the troublesome business of searching around for materials will be dealt with by the kit manufacturer, who in a sense becomes a one-stop-shop.
The problem is that the marking and cutting process makes up only a tiny proportion of the time required to complete the building of a boat. It generally takes me about four months to build a 15 foot dinghy, including painting and making the mast, spars, and rigging. This is when I'm working full-time at building and generally with two boats going at a time. But the marking and cutting takes me only two or three days, and I find it to be relaxing work. Once those couple of days are gone - even allowing a week for a first-timer - the remaining work is going to take the same time regardless of whether it is a kit or a scratch-built boat.
Marking-out panels for a boat using a batten made from a pine offcut and homemade lead 'ducks'. You don't need ducks - just use anything heavy, or hammer in small tacks to locate the batten.
So in my opinion, there is not much of a time saving, in percentage terms, gained by using a kit. Not only that, but the place where time-savings may be achieved is the easiest part of the whole construction anyway!
Kit manufacturers face plenty of challenges in getting good-quality buildable kits to their customers. One perennial problem involves getting long panels into an easily transportable 8-foot flat-pack. In the last photo you can see that I'm marking a panel shape onto a 16-foot long panel made up of two sheets of plywood joined end-to-end using a scarph joint. Once that part of the boat is cut out the two ends will stay in the correct relationship to each other because they are joined by a rigid scarph joint. By that I mean that the marking of the curvaceous panel shape is done after the sheets of plywood have been joined together.
Using CAD and CNC cutting processes, kit manufacturers do a great job of cutting out accurate panel shapes, but mostly they do it on 8-foot long sheets. That means that the panels have to be joined after being cut. Because the person making the boat is sighting along the curved edge of a narrow plank or hull panel, it is very difficult to make sure that one end of the panel is in exactly the relationship to the other end that the designer intended.
In the above sketch you can see two topside panels for my stitch-and-glue design Flint. The line in the middle of each panel represents a scarph joint or a 'jigsaw puzzle' joint as used by kit manufacturers. The two panels appear to be identical, but the lower one is misaligned at the joint by a tiny amount for illustration purposes (actually one half of one degree, or, 0.5 of a degree). Although the hull panels look the same, the difference is substantial.
In the picture above, I have superimposed the correctly shaped panel (shown in dotted red) over the one with the half degree error in the joint. You will probably have to click on the picture to get an enlarged view, but the right-hand ends of the panels are out of alignment by 18mm or 3/4". If one tried to build a stitch-and-glue hull from these panels, the boat would inevitably come out with a twist and other longitudinal asymmetry.
My experience with stitch-and-glue hulls has shown me that the building method is wonderfully versatile, and that the time required to produce a light, strong and clean hull is vastly reduced over that needed to build conventionally over a station mold. BUT, the system can only work (without a mold, that is) if the marking out and cutting process results in port and starboard panels which are exact mirror images.
I try for an accuracy of less than half a millimetre (two hundredths of an inch). That may sound like boasting, but it is actually quite easy to achieve if care is taken. It does not refer to the absolute accuracy of the shape, but rather relates to the similarity in shape of the mirror-image panels. I mark and cut one panel from pre-scarphed plywood sheets and then lay it on top of the material for the next panel and trace around with a sharp pencil or a ballpoint. After cutting out the second hull panel I place the two mirror images one on top of the other and run a sharp block plane around the edges of both to trim them to the required accuracy.
In the photo above you can see a kit 'jigsaw puzzle' joint after being glued with epoxy. It should be obvious that the required angular alignment cannot be relied on from the puzzle joints themselves. There are ways around it. One way would be to glue one plank together, then trace around it onto the scarphing bench or floor, and them lay-up the mirror image for gluing over the tracing. Another way, which I think is better, is to glue-up the two planks at the same time, one on-top of the other, with waxed paper or thin plastic between them at the joints. What is important is to understand the danger of planks and panels which are cut prior to being joined being glued-up out of alignment.
The alignment issue is a problem, but one which is easily overcome with planning. What I consider to be the far more concerning issue with these 'jigsaw puzzle' joints is that the hard glue lines intersect the soft surface of the plywood at 90 degrees. This means that there is a stress-riser at the surface and there is a danger that repeated expansion and contraction over time will result in a fine jigsaw puzzle-shaped crack appearing through the paint. The only effective solution to that is to have a fabric sheathing over the surface of the joint - say 4oz glass in epoxy, or maybe even lighter fabric - I'm not sure.
It is important that you understand that I am not against kits. For some people they provide an answer to problems, and the manufacturers go to great lengths to improve the breed all the time. From a purely personal point-of-view, I prefer to build from scratch - but if you do wish to build from a kit it is very important that you are aware of the pitfalls. As for stitch-and-glue, I believe that it is the best way of utilising plywood for hull construction from an engineering perspective, even though I prefer cutting bevels and working timber, to the epoxy and glass work required by stitch-and-glue. My Swampscott design should allow me to indulge myself with both stitch-and-glue and properly beveled glued-lapstrake in the one boat.
So, after a long and wordy response you have my answer to one part of Robert's question. I'll try to get around to the Swampscott method in another post.
Potpourri - '...a stew with a wide variety of ingredients ...' or '...any collection of miscellaneous or diverse items...'
Well, it has been three weeks since I wrote anything here, and I've been feeling mightily guilty about the delay. It has been caused by a range of things over which I've had little control, but the result has been that I've been so busy that somethings have had to slip. My website and this blog take a lot of time to maintain, and as I need to feed my family, a job at the local hardware store has had to take priority. The hardware store job will finish next Sunday afternoon, so I hope to get back to posting reasonably regularly.
I've recently finished building a sliding seat rowing boat for a friend in Brisbane. You can read some earlier comments in this post.
The kit-boat has turned out nicely, although I have some doubts about the use of 'jigsaw puzzle' joints to make full-length planks from eight foot long sections of plywood. It is the standard old problem faced by kit manufacturers - how do you pack a long boat into a flat-pack which is only eight feet long? Most use the so called 'jigsaw puzzle' joint, but the problem with long planks is that there is too much possibility of misalignment due to the tolerances in the joint. This is particularly serious when the planks are narrow as is the case with a lapstrake hull.
In the photo above you can see one of the plank sections in the foreground prior to being cut free from the routed sheet of ply.
Next photo shows a close-up of one of the planks after being cut from the sheet.
The fuzz left by the router was lightly sanded.
And here you can see that the kit manufacturer did a nice job of producing the puzzle joints.
The photo above shows one of the planks being clamped up on my very sturdy and flat scarphing bench. In the background you can see another set of clamps over a second joint. As the boat is around 19 feet long, each plank requires two joints to make up the full length. Not visible in this picture is the matching plank for the other side of the boat which is being clamped-up on the other side of the bench.
Here you can see that when some of the plank pairs were stacked on each other to check that they were identical, significant variations were discovered. This pair was the worst result I got, but when you consider that the angular difference at the joint was only 0.75 of one degree to produce this error, you can see how tricky it is when the planks are so narrow. I was aware of the potential problem and took extreme care with pencil lines drawn on the bench top taken from stacked sets of dry assembled planks. Most of mine worked out reasonably well, but the set shown in the above picture was so bad that I had to pull the joint apart using heat to soften the epoxy. The planks were then re-glued to an acceptable standard
In the right foreground you can see the puzzle joints in the assembled hull
The patented 'Lap-stitch' method used in this kit is a form of stitch-and-glue construction, and as with most stitch-and-glue designs, the hull does not require a strong-back nor a mold. However, any error in the shape of the hull components when laid out flat will result in a distorted hull after assembly because there is no mold to keep things aligned. If the plank shapes are wrong - even slightly - the hull will be out of shape. I do not mean to imply that the kit, nor the design, are in anyway sub-standard - I think it is an excellent boat. What I am saying is that if you are going to build a boat using jigsaw puzzle joints and a moldless construction, then you had better be extremely careful to ensure that there is no distortion induced by the use of puzzle joints - particularly in long, narrow boats with many (therefore very narrow) planks.
Here are a few more pictures of the finished boat, looking very nice to my eyes.
A customer (and friend) has delivered his partially-completed Jim Michalak Scram Pram to me to have the boat finished. Unfortunately, work pressure has prevented the owner from completing the work.
A Scram Pram photo taken from Jim's catalogue on Duckworks
I'm excited about getting this job for two reasons;
I hold Jim Michalak's work in very high regard; and
Scram Pram incorporates the 'Birdwatcher' cabin arrangement, which was devised by Phil Bolger and put to excellent use by Jim in a number of his designs.
For decades I have been fascinated by the functional possibilities of the 'Birdwatcher' cabin. The idea is that all crew members sit inside the boat with their heads covered by the raised-deck of the cabin and looking out through panoramic plastic windows. There is a slot down the centre of the cabin - usually about two feet wide - which allows people to walk up and down the boat while standing upright, yet well protected from falling overboard.
This photo shows part of the interior of a Birdwatcher. I have taken it from the web, but I'm pretty sure that it belongs to Mason Smith.
The best way to describe the Birdwatcher concept is to read what Phil Bolger himself said about the idea. This essay is taken from the now-defunct magazine, Small Boat Journal.
Dear SBJ
The first time I ever heard of Phil Bolger was when I received the
literature on Dovekie (see SBJ#39)
from Edey & Duff. Dovekie encompasses everything I want in a boat but
is only available in a sailaway version. I would rather build my own or
something very similar. I’ve built three previous boats and enjoyed the
experiences immensely. Does Phil Bolger have plans available for a homebuilt
version of Dovekie?
— L.D. Blotter Ogden,
Utah
PHILIP BOLGER REPLIES
Dear Mr. Blotter,
Several others besides you have asked for a home-built
Dovekie, but even the prototype Dovekie was impractical for one-off building,
and after several years’ development by Peter Duff, it’s out of the
question.
What I take you to mean, though, is not necessarily a copy
of Dovekie, but a new design with the same objectives: a very light and shallow
boat combining cabin and cockpit into one large space, with oar instead of motor
auxiliary, and capable of being sailed in an unstrenuous fashion. One should be
able to enjoy this boat in intricate and inaccessible places afloat, as well as
trailer it far and fast on the highway. It is what 1984 Sea Trials judge Jack
Dunn (see SBJ #39) called a
“birdwatcher” a craft “in which one might poke through a marsh or backwater in
search of nothing more than a pleasant lunch and a tan.”
For home building, the sharp-sterned “instant boat” shape
has a good record. The sides are prefabricated simply by sawing three
4-foot-by-8-foot sheets of plywood down the center and butting them. Wrapped
around four bulkheads with flared sides, these straight-edge panels produce the
sheer, rocker, and raked ends shown: a hull not at all crude or ungraceful to my
eye, and one that can sail and row most respectably.
Hulls like this go best trimmed down by the stern. They’re
not happy if the harsh forefoot gets in the water, but they can stand a lot of
weight if it’s kept aft since a pointed stern doesn’t drag much at any depth.
Sail-carrying power is less than in a boat with a wide stern, but the loss isn’t
prohibitive.
Galley Rower
A major advantage of this hull shape is that the oars can be
trailed straight aft without shipping them, an advantage when passing through a
narrow place or past an obstacle. This has been a problem for craft with closed
oar ports ever since war galleys tried to scrape each others oars off. The
closed ports are necessary in any high-sided boat meant to be rowed seriously,
for an oar working at a steep angle to the water makes heavy work and little
power.
The far aft placement also puts the oars where the sides are
close enough together to use oars only 7 feet long. These have less drive than
9½-foot oars, but they’re easier to ship and unship and stow in the boat. They
also can be worked in tighter quarters, such as narrow creeks and marina slips,
and they’re much cheaper to buy and more easily replaced at short notice. She’s
not meant to be rowed far or fast in any case. The 7-foot oars should move her
2½ mph in a glassy calm. With a short, quick stroke, it will be possible to move
her a short distance against a fair breeze, or across a strong breeze with calculated use of the
centerboard.
I know very well that these oars, or even the longer oars of
Dovekie, can’t do everything a motor can. Ingenuity and patience are supposed to
substitute for power. Plan routes to go with swift streams, not against them.
Till the tide turns or the wind shifts, sit and look at birds or read Francis
Herreshoff on yacht design (he said it all). However, if nothing but a motor
will suffice, I’d suggest the yawl-boat way — in this case a small inflatable
with motor fitting to push or pull the mother ship. Birdwatcher can tow it quite
easily under sail, though not under oars. An inflatable would also be useful for
shoreside excursions because Birdwatcher isn’t light enough to drag or carry
over flats at low tide or small enough to be welcome in a crowded dinghypark.
Her shallow draft doesn’t make her an adequate substitute for a tender.
No boat meant to row can afford the tremendous drag of an
immersed rudder or centerboard. A swinging-blade outboard rudder takes care of
half the problem. The proposed hull shape isn’t well suited to leeboards, so
the centerboard is designed to come up flush with the bottom. There’s some drag
from the edges of the slot, but I don’t think it will be very noticeable. Under
sail, the centerboard’s broad, delta shape is designed to be effective with
less-than-optimum attention to the tiller.
Glassed-In
Now for the radical
part of the concept. Live ballast, crew weight, is important to the sailing of
any very light boat. Yet in this case, we want to avoid strenuous positions as
much as possible. For our purposes, the best place for the crew is on the bottom
of the boat. Hiking or trapeze riding is exhausting for birdwatcher-type crews,
and it loses effectiveness if the boat heels sharply. Helmsmen and crew both
have to concentrate fiercely to keep the boat sailing as upright as possible.
But with the crew sitting on the bottom, the weight gains effectiveness with
increasing heel. Crew can chock themselves comfortably in place and let the
boat heel as much as she likes instead of scrambling to hold her down.
The catch is that even on the bottom the weight is not very effective
unless it’s well over to the weather side. And if the boat is open on the
weather side to allow this, it’s normally open on the lee side as well and will
ship water if she heels a lot. Raising the sides high enough to come clear above
the heads of crew sitting on the bottom, with enough deck overhead to allow the
boat to float dry flat on her side or beyond, would make the boat uncapsizable,
except in a breaking sea. The upper sides would be transparent plastic for an
all-around view, with enough transparent panels in the top to watch the sail.
The open center keeps most of the advantages of an open boat —mainly being able
to move around without clinging precariously on top of the boat. As the cartoon
section shows, an adult is waist deep for almost the full length of the
boat.
To keep this “standing room” clear, I’ve located both mast and
centerboard off center. The off-centerboard case is still far enough inboard to
have its top open with no risk of flooding her through it. The space outboard of
it forms a big bin for general stowage, even real mattresses. Since I want the
weight kept aft in this hull shape, I don’t mind blocking off the bottom there.
Underway, the crew would sit just abaft it, where they should be for best
trim.
The tiller is hooked up to be comfortable for a helmsman sitting
under the deck but pivoted so he can stand up with it still in hand. The
connections are a little busy but can be made strong and positive. If I do
working plans for this boat, I intend to add a triangular cap on the outside of
the sternpost to reduce the rake of the rudder axis and tiller stock.
It’s possible that sometimes, in some places, this raised deck
arrangement will be intolerably hot. I hope there will be an eddying air
circulation through the centerline opening, but that remains to be seen.
Opening panels in the sides would be complicated to build and degrade security.
(The oar ports are bad enough, but even if one of them were caught open at the
wrong time, they’re not big enough to flood her suddenly.) Using plastic with
ultraviolet filtering, either the usual “black glass” or the outside mirror
material sometimes seen in vans, should help by giving some shade and ought to
reduce sunburn and eyestrain. Unless the wind is very strong, one could stand up
now and then for a breath of fresh air. At any rate, if the ventilation turns
out to be bad on a hot day, the shelter will be good on a cold one.
The long standing room can be covered by a tightly-stretched hood
unrolled from end to end, with a stiffened section over the slope at the stern
that could be swung up to get in or out with a minimum of drip. With this cover
in place, she’d be highly streamlined for very low drag at highway speeds or for
riding out a gale at anchor or on the beach. It would also be easy to design a
full-headroom tent (see “Shallow Draft Boat Tents,” SBJ #44) or awning and put the hibachi
on deck.
Docile Rig
The rig, disregarding the ballooner shown, is the most docile and
foolproof there is. There’s no halyard, allowing the mast to be slender at the
top and eliminating expensive track or messy lacing. The sail is rolled from
the clew toward the mast, keeping the leech tight inside the roll. Despite a
little trick of angle and tension to avoid leaving a loose flap at the top, this
arrangement reduces the temptation of leaving the mast standing under oars or
at anchor. Except when actually sailing, mast and sail are supposed to lie in
the racks on deck, as shown, except that I drew it with the wrong end to — the
heel ought to be forward. To sail, drop the heel into the step and walk it
upright —no feat, given the secure footing and waist-high coamings.
The sail could be reefed by shifting the head lashing before putting
the mast up, but I don’t think reefing will be necessary. The size of the sail
is modest. By swaying on the snotter, the sprit boom will flatten this sail out
all the way up, so the sheet can be eased without letting the head of the sail
flog. The pull of the snotter will bow the mast forward to take draft out of the
sail. With such effective feathering, in a hull that can heel any amount without
problems, she can “lug what she can’t. carry.”
Off the wind, the sprit-boomed sail swings out without twisting
forward at the top, so she won’t roll much, let alone threaten goose-winging.
Since such a sail is very light to sheet in all points, the single-part sheet
shown is perfectly adequate, saving tangles as well as expense. And the
self-righting boat allows it to be cleated without qualms.
I doubt the balloon jib is worth the cost or space. Set from the
offset mast, it would work noticeably better on port tack. It would set best
tacked on a pole, spinnaker-fashion, but that involves the extra spar and two
guys to control it. I’d rather relax and look at the scenery.
— Philip C.
Bolger
Here is Phil Bolger's original sketch of the Birdwatcher concept. Note the centreline hatch or walkway in the cabin top, and also the transparent sections of cabin roof aft through which the skipper can view the sails
This an enlargement of a section of the above image to clarify the arrangement.
There are a number of significant elements in the Birdwatcher cabin arrangement, but the most important is: -
that if the boat is capsised, the walkway remains above the capsised waterline and due to the buoyancy of the raised-deck cabin and the weight of the heavy bottom panel, the boat is self-righting; and
the occupants of the boat are protected from sunburn and/or cold water waves and spray.
The boat I've been asked to finish is Jim Michalak's Scram Pram design, which is 16ft x 6ft 6in. Here are a few photos taken by the owner before transporting the boat to my workshop.
The bottom of the stitch-and-glue multi-chine hull. The boat may look a little boxy, but this is a slippery shape
A good view of the Birdwatcher - style cabin. Note the very handy stowage for anchor rode etc behind the bow transom, which is cut away to allow easy access to and from the boat on a beach.
A good view of the boat. The cabin windows will be tinted plastic.
For many decades the dory has held a fascination for me. The term 'dory' is used incorrectly by many people to describe a wide range of boats. In reality, 'dory' refers to a method of construction rather than a particular type of boat, but the construction method does tend to produce a distinctive styl of vessel.
The construction method incorporates the following elements (or their developments using modern construction materials): -
a flat bottom panel which is relatively narrow, and planked longitudinally (instead of the cross-planking used on flat-bottomed skiffs and sharpies);
topside hull planking laps over the edge of the bottom panel (rather than the bottom panel lapping over the chine and lower edge of the topside planking as is the case with the sharpie);
substantial flare in the topside planking, which naturally produces a strong sheer.
It is said that the so-called Swampscott Dory type (named for one of the towns which had a strong dory building activity) represents the best type of dory for sailing. Dories were normally considered to be a rowing type, unsuited to sail, but the Swampscott and similar varieties had knuckle-sided multi-chine hulls which allowed the boat to carry a reasonable amount of sail.
I've drawn an initial proposal for a sailing Swampscott Dory which is high on my list of designs for my own "Final Boat" ( I've mentioned another candidate in a previous post). This dory incorporates a few of my own ideas, and may or may not be an improvement of the type - time will tell....
The two significant new elements of this design are: -
stronger bottom rocker than normal for a Swampscott; and
a combination of stitch-and-glue construction for the lower part of the hull and glued-lapstrake for the upper two planks.
I'm excited about the second point because I feel that it capitalises on the strong points of both construction techniques and mitigates their weak points. In addition, I expect that this boat can be built without a strongback or mold, and yet it still uses true glued-lapstrake with properly bevelled plank laps. I'll write in more detail at a later date. Here are two early images.
Lines drawing showing the unusual amount of bottom rocker
Sail plan showing the use of the sprit rig from Phoenix III/First Mate
The boat is 18ft 2-1/2ins (5493mm) LOA and 4ft 10ins (1475mm) breadth to the inside of the planking.


.jpg)


.JPG)

.JPG)
+-+Copy.JPG)


.JPG)


