Tuesday, February 19, 2013

Current jobs in the workshop include a Jim Michalak-designed Scram Pram I'm finishing off for a customer who has done a lot of work on the job already, but whose work commitments have prevented him from carrying out the final few jobs. See my previous post for photos. I have to say that this boat is very exciting and I look forward to the test sailing so that I can gain first-hand experience of the "Bird Watcher"concept.

Ian Hamilton's First Mate is nearing completion finally. The interior has been painted using a water-reducible linear polyurethane paint, and despite the difficulty in applying this sort of paint in very hot conditions (over the last month or so, the temperature inside my shed during the day has reached 43C/109.4F on many occasions), the end result has been very satisfactory. Properly applied, the paint ends up being as tough as the conventional two-pack polyurethanes, but has a pleasing subdued gloss which is appropriate for wooden boats, and the paint can be applied with much less concern about the dangers of VOCs (Volitile Organic Compounds). Brushes wash out in water, and as they say, you can drink the thinners (water!). I've used this sort of paint on many occasions in the past, and I can tell you that it is not easy to apply unless the conditions are perfect. However, if you follow the manufacturer's instructions to the letter, the end result is worth the effort.

Three Brothers. Ian's version will have the layout shown in the upper profile

As soon as either the Scram Pram or the First Mate has left the workshop, I'll be making a start on Three Brothers - this is also for Ian Hamilton. It is Ian's intention to use this boat on an extended journey along the Kimberley coast of Western Australia.


The intention with Three Brothers is to produce a boat which is simple and quick to build using the 'stitch-and-glue' construction method, and which will operate effectively in the semi-displacement mode. My aim was to get efficient running at a speed/length ratio of 2.2 which in the case of this boat means 10.5 knots or 12.1 mph. According to my calculations, with a reasonable load, this speed could be achieved with 15.6hp.

My performance predictions with 288kg (634lbs) passenger weight and 85kg (187lbs) for engine and fuel are as follows: -
·         Assume displacement of 820kg (1804 lbs) NOTE: This is for the performance calculations only. Displacement as shown in the drawings is 1191kg (2620 lbs) so the boat is capable of carrying significantly more than the 288kg (634lb) passenger load.

·         Salt water
·         LWL 22.6 ft
·         Power to achieve 10kts                                                           -           13.9hp
·         Power to achieve optimum SL ratio 2.2                              -           15.6hp
·         Speed with 30hp (Crouch’s Planing Speed Formula)             -           19.3kts
·         Speed with 40hp (Crouch’s Planing Speed Formula)             -           22.3kts
·         Speed with 50hp (Crouch’s Planing Speed Formula)             -           25kts
My choice of motor would be either:
·         18hp four-cycle outboard, giving a full-throttle fuel consumption of approximately 5.7 lt/hr (1.5 gal/hr);
·         30hp four-cycle outboard, giving a full-throttle fuel consumption of approximately 9.8 lt/hr (2.6 gal/hr);
·         30hp two-cycle outboard, giving a full-throttle fuel consumption of approximately 13.0 lt/hr ( 3.4 gal/hr), but with a weight and cost advantage.

      Due to the initial load that Ian thinks he will have to carry, he intends equipping his boat with a 50hp outboard, although this is still open to discussion.

      The construction of  Three Brothers will take place over about two years, as Ian needs to earn money to feed into the project, and I will only be able to devote a limited number of hours eack week due to other jobs.

      In addition to the building jobs mentioned, I have another First Mate to finish off, and three sets of plans to complete for publication.  The First Mate has been brought to a structurally complete hull stage by her owner, but changes to his work space mean that he must reluctantly pass the boat on to me for completion. However, he will do some work on her whenever he is able to get to my place.

      Plans for Whimbrel, Little Egret, and Fleet are all very close to publication stage, and in fact boats could be build using what is already available. However, I need to finish off some detail drawings and instructions before letting them loose.

Whimbrel
      
Little Egret

Fleet
     More information soon.


Thursday, February 14, 2013

Workshop News

It is about time I said a little bit about what is going on in the workshop. Being a one-man-band is very satisfying, but it means that just a few concurrent jobs take up all of my time. I like writing and designing, but at the moment I'm definitely burning the candle at both ends!

Annapolis Wherry Tandem
In late 2012 I reported on the construction of a CLC Annapolis Wherry Tandem in this post  and showed some photos of the finished boat in this one. After completion the Annapolis Wherry Tandem sat for a number of months under shelter beside my workshop because the owner was overseas doing post-graduate studies. 

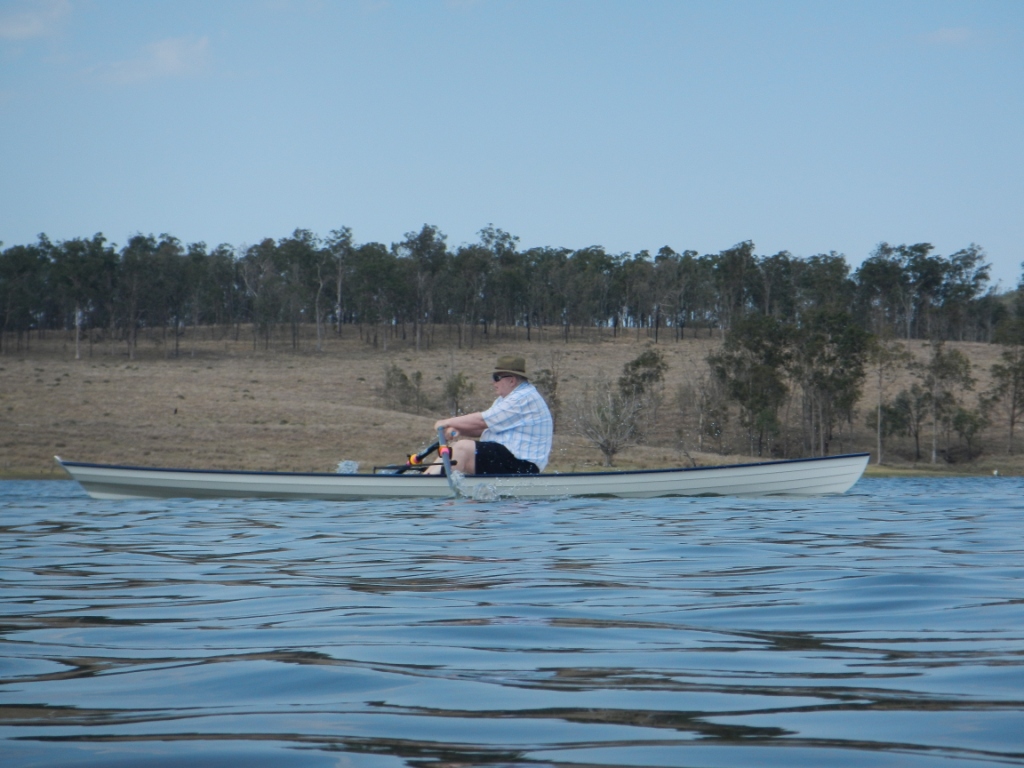
Well, the day finally came for a test row and the boat went very well indeed. The only problem was a slight bow-down trim, but that was sorted out on the second outing, and turned out to have simply been caused by having the foot stretcher set too far forward. With that adjusted the trim is now perfect. The following photos were taken on the initial outing, so you may just detect the trim I mentioned. Despite that the boat went fine, and on the second outing a few weeks later she was perfect.

That is the owner, Dr McArthur, looking on as I make preparations for the initial launching.  Dr McArthur is a very experienced oarsman, having rowed for 55 years of his long life.
Just getting the feel of the boat about two minutes after the launching.  You can see how we have the excellent  Piantedosi Row Wing adjusted for a "left-over-right" rigging.
A "turtle's eye view" as Dr McArthur  becomes more familiar with the boat. 
Even though we had the foot stretcher too far forward, the boat is still trimmed  reasonably, and she certainly ran nicely, with excellent directional stability.
The boat proved to be stable and fast. Subsequent outings have been  longer, and we've  explored more of the performance envelope. She is a practical and enjoyable package.

Jim Michalak Scram Pram

In this post I mentioned that I had been given the job of finishing off the construction of a Jim Michalak Scram Pram

My part in the project is nearing completion, with just some detail work around the hull, initial coating work on the spars, and setting up the running rigging and sail to go. The owner will pick-up the boat and do the remainder of the painting and varnishing. However, I hope that he and I will be able to fit in a day or two of sea-trials prior to her departure (by road) for her home waters. Here are just a few pictures: -

View from the helmsman's position, port side, looking forward. You can see what an enormously roomy vessel she is for a light fifteen footer. It is easy to see that if the boat suffered a knock-down, the windows (not yet installed) and the raised deck on either side of the centre walkway would keep the boat dry and buoyant.
Forward/port window dry-installed with Pencil Cedar surrounds.  Window and internal framing held in with silicon bronze screws throughout. See the aft/port window loosely fitted and waiting for the surrounds to be fabricated.
Close-up of internal framing showing how I have stamped markings at the top/right to identify the components after disassembly. The window installation was a much more difficult and time-consuming process that I had anticipated, as each window is  slightly different from its fellows, and there were a number of lurking "tricks for young players".

Windows from the outside. The protective film and paper will be left in place as long as possible. Fore and aft decks will be screwed down onto flexible bedding compount to allow future removal for maintenance. When I did it, it took 93  #8 x 1-1/4" silicon bronze screws! However, it is a very good idea.
Filling/draining bungs for the three water ballast tanks were sourced from Duckworks. They come as a brass tube (see longest tube in the photo) and an expanding rubber or plastic plug. When the lever is pushed down the plug expands and grips the inside of the tube. My problem was that the bottom of the boat is only 9mm/3/8" thick and the tube would protrude. I worked out the shortest length that the tube could be and still allow the plug a full-depth grip, and cut the tube (see cut tube in foreground). I then fabricated some blocks so that the tube protruded only 9mm/3/8" below the block. When set in the tanks on the bottom of the hull, the brass tube and plug fit neatly without extending past the outer surface of the hull. Note how I cut holes in the blocks and the brass tube to allow water to drain right down to the bottom of the tank.
Bung set into the bottom of the tank, positioned below the inspection port to allow opening and closing.  The block was very thoroughly sealed with about four full coats of epoxy prior to installation, and the tube and block were set in polyurethane bedding compound during installation. This was done so that the expansion and contraction of the brass would be taken up by the bedding compound - an epoxy joint would surely show hair-line cracks before long.

Mast partner is held to the forward bulkhead by four 5/16" bolts - two of them are silicon bronze and two (which you can see) extend through the aft face of the partner and act also as attachment and pivot for the mast gate, which I made from 8mm alloy plate. These two bolts are from 316 stainless steel, and if I can locate the required plate, I may replace the alloy with 316 stainless.
1-1/2" thick laminated mast step sitting upside-down on the bench prior to installation in the hull. Note the groove to act as a drain to prevent water accumulating in the step, and also the very thorough sealing of the internal surfaces with epoxy. This was done ahead of installation because access is difficult after. The rounded-over edge at the rear of the step (as it sits in the photo) is to allow it to sit neatly against the glass fillet between the forward bulkhead and the floor of the cabin (which is also the top of one of the water-ballast tanks).
More about jobs, both in the workshop and coming up, and also some progress reports on stock designs such as Whimbrel and Fleet in a day or so. I need to go to bed!

Tuesday, February 5, 2013

Following the Canoe Yawl Track

I've written before about Canoe Yawls here and here . There is something about the elegant simplicity and sense of independence which exerts a very powerful grip, although I'm beginning to wonder whether pure romanticism is the real driver

A George Holmes sketch of Ethel and Nan in Denmark in 1886. (Sail and Oar) John Leather
My brain seems to be particularly subject to distractions, and I find myself repeatedly going off on boat-related tangents which follow a predictable, if meandering, course. My latest one was started when I re-read some sections of L. Francis Herreshoff's superb book, The Common Sense of Yacht Design, in search of a particular bit of technical data. Something in the book about the optimum forefoot shape for a sailing boat lead me eventually back to Albert Strange's beautiful Wenda design, a longtime favourite of mine

Albert Strange Wenda (forum.woodenboat.com)

A photo of Wenda 's beautiful stern. This example was built for Dick Wynne by boatbuilder Fabian Bush. 
Another view of Wenda.  www.fabianbush.com
Being on a roll (once again) about canoe yawls, I got talking with my boating friend, Ian Hamilton, in the hope that he would get swept up in the process also. Ian had for years been smitten by another of Albert Strange's designs - in this case the designer's own favourite, Cherub II, so I expected his full support. Strangely he was ambivalent, saying that he had come to realise over the years, that the canoe yawls which appealed to us so much were "...cold water boats...".

Albert Strange's personal favourite, Cherub II  (Sail and Oar by John Leather)

Cherub II - Lines and General Arrangement (Sail and Oar by John Leather)
Over the last week or so I've been pondering Ian's comment about the canoe yawls being "...cold water boats..." and I'm not sure I agree with him. However, it did stop me from marching off blindly on another enthusiasm, and gave me pause for thought.

What it comes down to is that the activity and the boats change depending on geographical location, but the philosophy remains unchanged.

A William Garden-designed Eel, complete with hinged cuddy-cabin top just like the canoe yawls of the late 1800's. This particular example was built glued-lapstrake, with epoxy-bonded marine plywood planking. She is a very "open" sort of boat, but I think she would look at home on just about any coastal waterway.


Two pictures of my Little Egret design, which would make an excellent  "warm and shallow water"  canoe yawl.  Remember, canoe yawls are not necessarily canoes, and aren't always rigged as yawls. The name relates to boats which evolved from canoes, some of which resembled ship's yawl boats. 
Around the time that I was in full canoe yawl swing, one of my sons was beginning to make repeated comments about setting up a syndicate and having me build a Phil Bolger-designed Black Skimmer for use on Moreton Bay and the Great Sandy Straits (Queensland, Australia). Black Skimmer is a 25ft 3in x 7ft x 10in cat yawl-rigged leeboard sharpie built from plywood and epoxy.

Tashtego, a beautiful example of Phil Bolger's Black Skimmer-design, built around 1980 by Walter Baron of Old Wharf Dory Co.   www.oldwharf.com
I had been putting son David off about a Black Skimmer, on the basis that we couldn't justify a boat of that size. But with my new attitude towards the sorts of boats suited to the canoe yawl function in our part of the word (hot, and lots of shallow water), and given the possibility of a family syndicate to spread costs and maybe keep the boat in the one family for generations, excitement started to build.

Black Skimmer (plans here) has been my dreamboat (along with Rozinante) for the last 33 years. But in the last decade or so, I've been preaching the "small boats get used more" line so strongly that I had just about convinced myself that my dreamboats were off the agenda. I hadn't considered the enthusiasm, optimism, and idealism of youth ever coming back to me, but I hadn't counted on the advantage of having kids!

So, what is special about Black Skimmer? Here is a partial list: -

  • shoal draft - 10 or 11 inches/ 279mm;
  • free-standing rig with masts which do not pierce the watertight volume and can be raised and lowered without a crane;
  • self-vanging sails (due to the sprit booms);
  • self-righting with a self-draining cockpit;
  • effective watertight ventilation arrangement;
  • leeboards and the resultant open interior and strong bottom;
  • simple, but well engineered, structure;
  • self-draining well forward (for anchor, chain, mud, and sail handling;
  • self-draining well aft for outboard, fuel, anchor, mud, and crabs;
  • wonderful sprawling space in a cabin arranged with a raised deck. This is a strong, easily-built cabin-structure, and it provides important reserve buoyancy in the event of a knock-down;
  • sitting headroom in the cabin;
  • proven performance.
Having said all that, I am still haunted by the vision of a beautiful double-ended canoe yawl like Wenda or Rozinante.  Just today I was contacted by an exceptionally knowledgable and experienced friend who told me that I had only one life, and that if I didn't build a Rozinante  I would go to my grave a lesser man.


Sunday, January 20, 2013

Catching Up on Some Comments

For quite a long time now I've been unable to up-load photos to my blog without going through the process of putting them on a picture hosting site and them using the url of each individual photo. With the combination of Christmas/New Year, and a lot of building work to be done, I am afraid that posting has fallen behind. This is all done in my own time, and at my own expense, and it sometimes must take second place to paying work!

The computer people here will roll their eyes, but I've finally discovered that the picture loading problem was caused by incompatibility between the Microsoft Internet Explorer I had been using and the Google Blogger program which I use for the blog. I've now changed to Google Chrome for my internet work, and all seems to be working fine.

So I'm going to start off by answering a few comments that have been left on some of my posts.

Mr.Lillistone,I've followed your blog for a while,Thank you for your time,energy ,and expertise,It is appreciated by many!!! I know you have built both Michalak's Mayfly and Redmond's Bluegill,I'm considering building either one and would like your professional opinion.Do you think the Mayfly leeboard and balanced lug sail plan could be used on the Bluegill ,if the sail is properly positioned over the leeboard,and leeboard is centered on beam?I would like the open cockpit the leeboard affords.Any info. Would be appreciated thanks in advance ! Jerry Fehn on Reality

The Bluegill we built, showing her centreboard case
Jerry's comment refers to a matter which has nagged at me for many decades. A centreboard is convenient to use and is to a large extent self-tending i.e. put it down and if you are too busy for detail work, just leave it down until it hits the bottom coming home. On the other hand, leeboards need to be handled from tack to tack because, as their name suggests, they only work when set on the leeward side of the boat.

A raised leeboard on a Dutch Yacht (taken from http://www.leeboards.com/)
That is me sailing my Bolger Nymph a long time ago. I had fitted her with leeboard for experimental purposes, but in this photo they are both raised as the boat is running downwind.
My understanding is that leeboards originated in China, along with such things as stern-mounted rudders, centreboards, and watertight bulkheads to name just a few Chinese nautical inventions/developments. Leeboard use has been widespread, but most people associate them with Dutch, German, and British sailing vessels.

This shows a typical lowed position for a leeboard.

Leeboards may appear untidy to some eyes, and to need handling from tack to tack, but they are highly efficient. Frequently the boards are angled away from the hull to allow a clean passage of water between the hull and the board so as to prevent excessive drag. This feature also means that as the boat heels, the board becomes more and more vertical - which is just the opposite of what happens with a centreboard or fixed keel. Not only does the board become more vertical, but it also works from the surface of the water, whereas the centreboard only works from where it exits the bottom of the boat. This has the additional benefit of allowing leeboards to operate effectively in a partially raised position in shallow water, and not extend below the bottom of the boat.

A Bolger Black Skimmer sailing with her board partially raised. The board is effective, but does not extend any deeper than the hull, if at all. (Photo from Woodenboat Magazine)
An overlooked plus with leeboards is that because they each operate operate on different sides of the boat (in their normal form anyway - more on that later) the sectional shape of the boards can be asymmetrical, allowing the board to lift the boat to windward at a reduced angle-of-attack in comparison with a board which has a symmetrical foil shape. The boards should have a flat face away from the boat and a cambered face towards the boat.


An Otter II with both of her leeboards raised while on her shallow water mooring. Note how the owner has the leeboards on the incorrect sides. The cambered section should face the hull, so in this case the starboard board is mounted on the port side, and the port board is mounted on the starboard side!
You may wonder why leeboards frequently have a tear-drop or triangular shape, with the widest part down low. This is because they are surface-piercing foils, and the inverted taper shape helps to reduce air-ingestion  on the low-pressure side of the board.

Despite the visual and actual clutter of the boards, they have some potent advantages in addition to the ones already mentioned: -

  • the interior of the boat is totally free of the intrusion of a centreboard case; and
  • the bottom of the boat is stronger without a centreboard slot; and
  • there is no centreboard slot to get jambed up with mud, stones, shell grit and sand - which therefore leads to the centreboard being jambed.
It is possible to mount the leeboard to one side of the boat only, but for that to be effective, the board must be prevented from bending away from the side of the hull when it is on the up-wind side. This can be done using a 'dagger leeboard' ( which I guess would be a 'weatherboard' on one tack) where a variety of methods are used to hold the board in place. Alternatively, you can have a pivoting 'lee board' as developed by Jim Michalak and others. In this case, the board is held parallel to the side of the boat by a pivot bolt and wooden guards and/or slots, but the board is free to pivot in the vertical plane. Although simple in concept, great care is required to ensure that all of the pivot locations and guard angles are absolutely correct.


Above two photos show the Michalak Mayfly 14 pivoting leeboard
Here is the finished boat
Note the completely unobstructed interior....
...the very simple raising and lowering gear...
...and the lower guard with the pivot bolt going through (the piece of unpainted wood is positioning piece on the trailer)
Now, to finally get to Jerry Fehn's question - Yes, it would be possible to mount a pivoting leeboard on Bluegill in place of the centreboard and case, but great care needs to be taken with the positioning of the board relative to the centre-of-area of the sail, and also with the geometry of the pivot point and the guards so that the board remains parallel with the centreline of the boat.

Having said all that, the first person who should be consulted would be Steve Redmond, the designer of Bluegill. As has been said many times in the past, no-one should alter the design of a boat without getting input from the original designer. This is not grandstanding at all - it is simply that the designer should have put a lot of thought into the design, and there may be elements there which are not obvious to the casual observer.

My recommendation would be to build something like Mayfly 14 if sailing is the most important aspect of operation. She sails superbly in my experience, and the shape of the hull is optimised for sailing whereas Bluegill's hull is a deliberate attempt to produce a hull that will row, sail, and operate as a planing powerboat.

Friday, January 4, 2013

Reality


I wrote this article many years ago. With the exception of the name of the main character, Mike Rowe (...Micro....), it is a true story.
Lying on the foredeck, Mike Rowe stared down the stem and contemplated the bow-wave of the small wooden boat. Behind him, and beyond the source of the regular “putoonk, putoonk, putoonk” emitted by the exhaust, Ken Foster sprawled in the stern sheets with his left arm laid out along the tiller. Ken’s look was distant, but relaxed. 

The boat these men were operating was of the simplest type. Built half-a-dozen decades earlier of inch-thick topside planking, with inch-and-a-half on the bottom, she carried the scars of her life as a fishing boat and hire vessel. Although she could not hide her age, she had done what the other boats in the harbour could not – she had aged gracefully.


Recent events had been kind to this beautiful boat.  

Ken had seen an entry in the classified section of the paper, offering some of a hire-boat fleet for sale. The business had changed hands and the owners were equipping themselves with a bunch of new, outboard-powered tinnies. Good business sense? Time would tell. 

At first sight, a lesser man than Ken could have been put off the deal. What paint remained was cracked and peeling, oil and fish scales lay in the bilge, and the motor emitted blue smoke and rusty water. The planking and framing showed evidence of “quick-and-dirty” running repairs, in which chopped-strand fiberglass mat starred prominently.  

Several months of hard labour had given Ken a renovated boat and a restored engine. New timber melded with old in a way which would have clashed in a more pretentious vessel, but which looked just right on this one. Brightwork was minimal, the paintwork was done in green and buff, and the engine displayed red paint, brushed bronze and drips of oil.  


Mike Rowe and his son had left the workshop early in order to go for a ride in Ken’s boat. They were planning the construction of a new putt-putt boat and intended to use a W.M. Olds & Sons 4-6hp four-stroke also. This was an ideal opportunity to sample the experience. For over a year, their engine had sat silently in the workshop, moving only when one of them put on a few drops of oil and then turned it over by hand to feel the compression. Imaginations had run gently wild. 

As Ken turned the crank-handle and his engine throbbed into life, they looked at each other in silent agreement. This was really good! Weather conditions were such that a trip around the harbour was more suitable that fighting the steep Moreton Bay chop whipped up by several days of 25 to 30 knot winds. The boat would have handled it without trouble, but that wasn’t the aim of the afternoon. 

They spent over an hour touring the yacht harbour, and in that time they made some interesting observations. At one point they stopped to examine a putt-putt of a similar size to Ken’s. This boat was lapstrake (clinker) but made of moulded fiberglass. She carried all of the standard add-ons which are thought necessary to make a “character” boat – bits of teak, brass bow-chocks and bollards, a heavily varnished rudder and tiller…  

Viewed amongst the surrounding plastic and alloy yachts, the ‘glass launch looked interesting and wholesome. But when Ken’s old thumper was tied-up near by, the new boat just looked silly. Despite having cost a tiny fraction of the price of the clinker production boat, the old and worn fishing boat won the looks contest hands-down. 


Our trio felt no envy as they toured lines of millionaire’s play boats, but the eyes of many observers followed them with interest. Which boat was delivering the most fun for the dollar? 

The bow-wave peeled off the side of the boat in a clean curl, swept down low amidships and rose to leave the transom in a gentle boil of prop wash and wake. Mike Rowe would have been happy to view this scene for hours, and he was captivated by the sense of speed. This speed seemed miraculous given the modest number of putts-per-minute, and the gentle rate at which the heavy flywheel was turning. 

Although Mike was a sailor by nature, he found the motion of this fine boat to be incredibly relaxing. The frequency of the engine sound was soothing, and the noise level low enough to allow easy conversation. Despite this, the occupants did little talking. Instead, they absorbed the sounds of the water passing the boat, felt the wind in their hair, and drifted within their own minds. 


Little wonder then, that these three people came ashore feeling relaxed and happy. Later, as they drove out of the car park, they saw a man who had glanced at their boat as he tied up his massive power cruiser. The man did not notice them this time, as they sat in the ute. He was concentrating on traffic while waiting for an opportunity to turn onto the main road. The big BMW accelerated past, and Mike Rowe observed that the man’s face looked fixed and preoccupied...

Tuesday, December 18, 2012

A Short Beach Cruise


Regular readers will have noticed that there haven't been any posts for a while now, and reason is simply that I've had too much to do! Writing a blog takes time and imagination, and this last month has left me very little spare time, and my imagination seems to have been overwhelmed by other responsibilities.

A Short Beach-Cruising Expedition on the Central Queensland Coast.


Back in the year 2000, I took my three boys on a camping trip near the town which is named, "Town of 1770" on the central coast of the state of Queensland, Australia. Situated adjacent to the southern end of the famous Great Barrier Reef, this part of the Queensland coast offers superb beach-cruising and island-hopping opportunities.

One of the boys at the time of our first trip to 1770. The same skipper is now nearly 25, and is still addicted to wooden boats. Start 'em young and you will be giving a gift which lasts a lifetime.
At the time of the year 2000 trip, my kids and three other children ran wild (but under covert observation!) for several days and nights. There were boating adventures, fishing adventures, and exciting night-time exploration of moonlit sandbars starting to rise above the many waterways of the heavily tidal estuary.

In the last couple of years there has been a bit of talk between a few of the now adults who made up the pack of kids nearly thirteen years ago. There was an obvious and growing urge to re-live that trip, and pressure was placed on me to come along. As one of my sons said, "We are going anyway, so you can decide whether to come along or stay in your workshop." He knew that a comment like that represented an unfair challenge, and predictably, I decided to go.

History repeats itself - the only change being the size of the kids.
Our plan was to leave our cars and trailers at the Town of 1770 camping ground in sites we had rented for just that purpose, and to then sail north along the coast to Jenny Lind Creek and to make our camp in the bush somewhere near the creek (keeping a weather eye open for crocodiles).

I don't know how to insert Google Earth links, but if you look up Town of 1770, Queensland, Australia and Bustard Head, Queensland, Australia, you should get to see the area in question. Jenny Lind Creek is the coastal creek immediately south of Bustard Head.

As it turned out, we arrived during a period of strong south-east stream weather, and the bars along that part of the coast were dangerous for small boats such as ours. We spent time operating to the north-west of the headland, and in there the conditions were smooth, but the wind was unsuitable for pleasant sailing. The strong south-easter was blowing over the top of the headland and we were in frustratingly fluky wind conditions.

All dressed up but no suitable wind for local sailing. That is Bustard Head which you can just see as high ground in the far distance. Jenny Lind Creek is at the bottom of that spur.
However, there is always something to do if you have a boat, and so we did some exploring of the estuary near 1770. But first two of us had to try the conditions outside the shelter of the headland. We tied in a double-reef and with the other two guys stationed suitably for observation and photography, off we went!

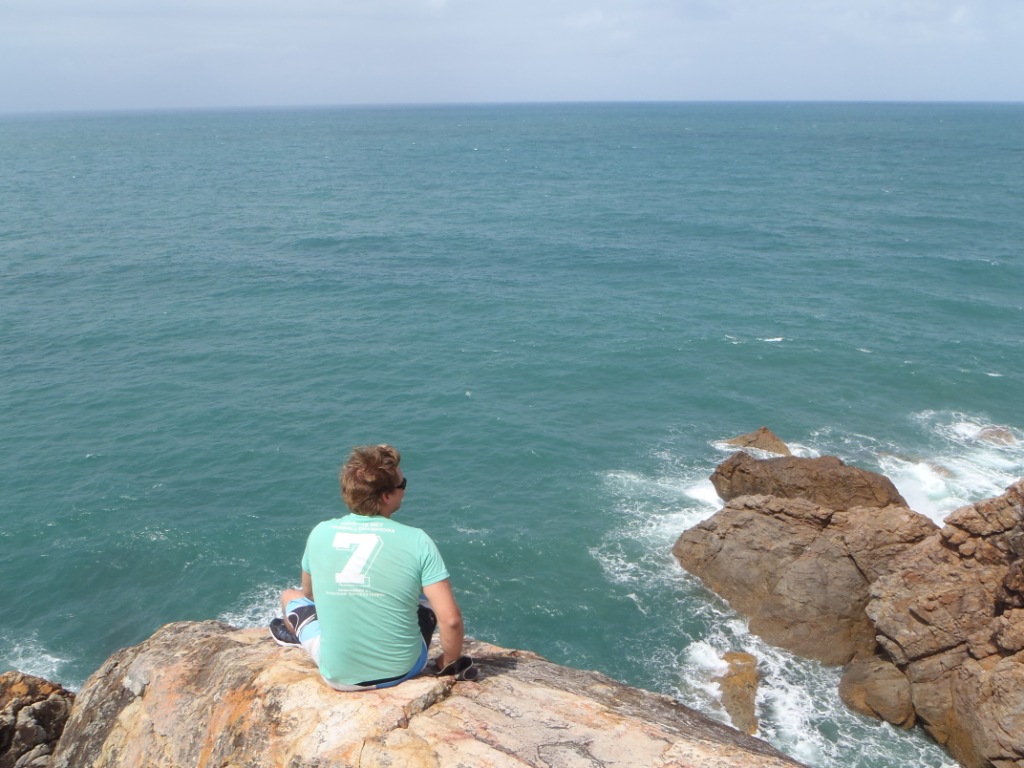
Sons Geoff and Dave did a reconnaissance before we went out. That is Dave high on the headland, with Geoff taking the photo

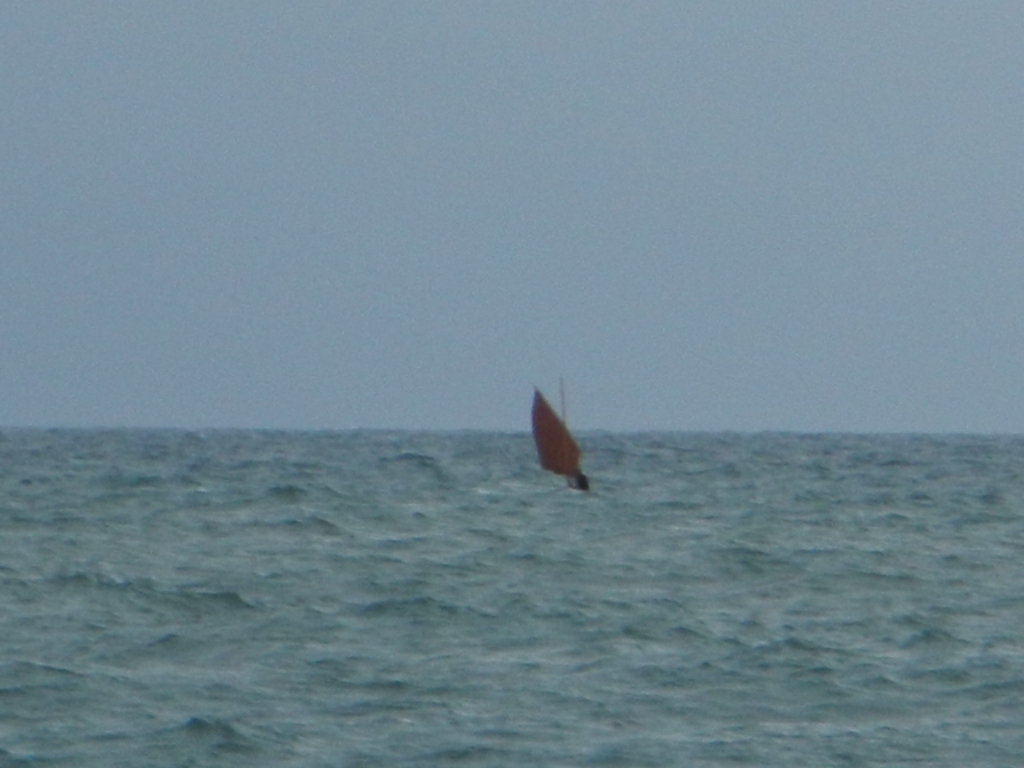
Double-reefed, and with PFD's on, son David and I head out towards the headland. Even though it is pretty calm, the bow wave indicates that we are on the move. This sort of sailing should not be attempted if you lack experience, and the correct equipment.
Clearing the wind-shadow of the headland, and starting to feel that the double-reef was a wise move. Note how the hull is disappearing behind the waves.

A nice photo taken by my friend, Ian Hamilton
Cameras always seem to make the sea look flat, but trust me when I say that it was rough out there!
Back inside the headland with the boat snugged down for the night. One of the pleasures I gain from dinghy sailing is looking at a beautiful boat swinging to an anchor. This great photo was taken by Geoffrey Lillistone
 One of the good things about being stuck inside the estuary for a few days was that we were free to explore and have fun, without time limits. One favourite game is seeing if you can get around a particular obstacle without tacking, or doing it in fewer tacks than someone else...


Geoff photographing one of our attempts at weathering a conveniently placed sandbar. He is shooting from inside Ian Hamilton's Bolger-designed Sharpshooter.
We have sighted the challenging sandbar, and the game is on...
A handy little wind shift helps our cause...

...but the wind drops away and backs, making things look tricky - and brings on worried looks.

Pinching up in the hope that we can balance boat-speed against ground lost to leeway.
We made it!

The smiles show you just how much fun these challenges can be.

A lesson in hydrodynamics - see how the boat pulls a big wave when in very shallow water.


 After a few days of playing, the wind moderated enough for us to attempt an outside run to have a look further up the coast. Due to time constraints we all climbed aboard Ian's Bolger Sharpshooter.

Approaching Middle Creek bar from the seaward side.

Safely inside the Middle Creek estuary, with just enough time to....

....scramble through the bush to have a walk on the ocean side. That is the headland and Town of 1770 in the distance.

Ian playing the fool for the camera. His Sharpshooter has done some interesting trips since he first built her a long time ago. He runs a 30hp Yamaha 2-stroke with a 4hp Johnson auxiliary.

This "Birdwatcher"-style cuddy-cabin is an addition which has proved to be of wonderful value.

Not everybody makes it through the bar. Well, I guess it was probably a simple case of abandonment, but it makes a nice photo. Taken by Ian Hamilton.

The two boats we used on this trip are examples of well-used home-built boats which have stood the test of time. The sailing dinghy was designed and built by my father back in 1970, and has been in constant use ever since. She has done a huge amount of work, but is still going strong. Ian's Sharpshooter has been going for at least twenty years, and probably more. Neither boat cost much to build, but they have provided satisfaction and adventure beyond measure.

I look at internet forums where people talk endlessly about minute details regarding this boat or that which they are "going to build". My response is to forget about procrastinating, and just get out there, build a boat, and learn to use her. You will be glad you did!